

How to Fix Loose Outlets or Sunk-In Outlets: Are UniShim Outlet Spacers the fix?
Loose outlets and switches are something almost every homeowner eventually encounters. I’m not talking about plugs falling out but the actual device itself pushing in when using it. This happens with receptacles (outlets) frequently, but sometimes switches as well.
You remove a receptacle or switch and discover that the electrical box sits too far back, the drywall opening is oversized, or the device simply doesn’t sit flush against the wall surface. You tighten the mounting screws, yet the device still rocks side to side, the cover plate sits crooked, or the drywall begins cracking around the opening.
For decades homeowners and us electricians have relied on a variety of methods from stacked washers, homemade spiral shims of wire, and some commercially available plastic spacers. Some methods work well enough. Others become frustrating because they require repeated adjustments. Nothing has really solved the issue or worked 100%. Until now.
I recently came across a product in a Mike Holt newsletter called UniShim. This neat little spacer has been getting attention and quickly becoming the gold standard and the only way to solve the issue of a sunk in outlet. They’re super easy to install and you can get them right on Amazon here. True story, I became an Amazon affiliate recently to help this product get out in to the world because I genuinely think it’s that great.
What Is UniShim?
UniShim is marketed as the first adjustable outlet spacer designed to provide mechanical positioning and fastening for electrical devices and light fixture installations.
Unlike traditional outlet shims or receptacle spacers that often require trial and error, UniShim functions as an adjustable shim that allows installers to fine-tune device depth for a stronger and more consistent installation. The neat part is how it locks in place when you want it to at the depth of the wall you’re aiming for. They work on standard receptacles, gfci receptacles, switches, dimmers, light fixtures, and pretty much anything that requires a 6-32 or 8-32 screw.
The idea is straightforward:
Rather than relying entirely on drywall edges or improvised spacers for support, UniShim creates adjustable spacing and support behind the device.
For electricians dealing with a sunk-in receptacle or recessed electrical box, this can offer another option beyond traditional electrical spacers.
How UniShim works and how to install
Unishim is very simple to use. I’m working on uploading a video that I’ll publish here as well. Here are some pictures to illustrate the install process:
1. Remove the 6-32 screw that holds the device. It needs to be long enough to reach the box with ample threads to hold tight so depending on the application you may need longer screws.
2. Thread the Unishim on to the screw with the catch pin facing you. Leave at least 1/4″ between the Unishim and the yoke (metal part of the device). See picture below.
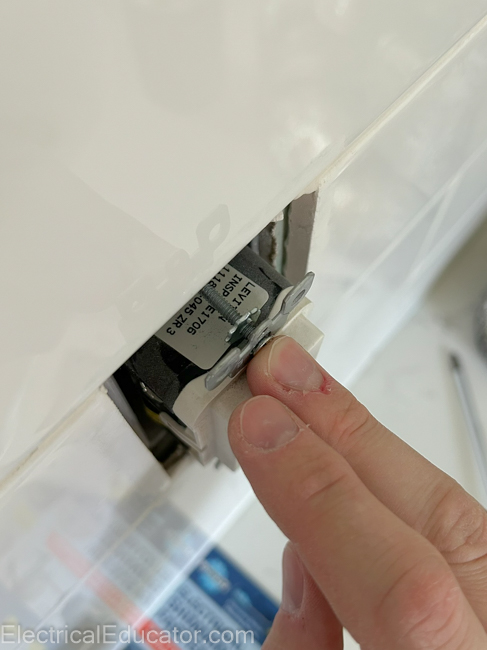
3. Start screwing the 6-32 in to the box: The Unishim will turn with the screw, let it! You may need to pull on the device a bit to keep it off of the unishim. For this part we don’t want them touching. Tighten the screw until the unishim is flush with the wall surface.
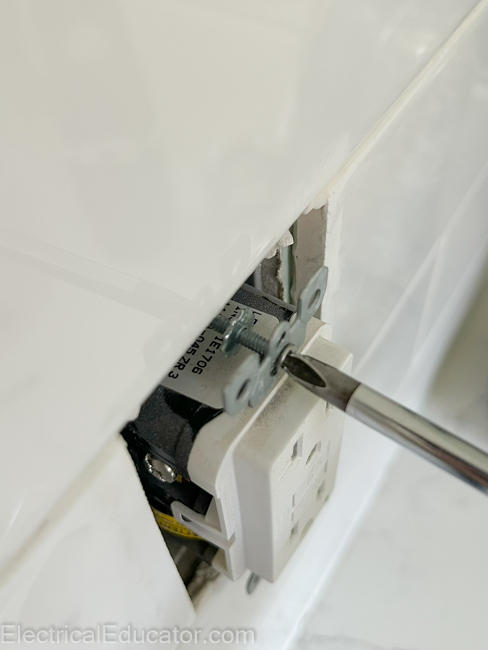
4. Test your fit and lock it in: The unishim should be flush with the wall. maybe a hair recessed depending on your application. Dont worry, it’s easy to adjust if you need. Push the device against the unishim and make sure the catch pin is in the oval of the yoke where the screw sits. Now you can tighten the screw fully and the shim will stay exactly where it is. For me, this was the really interesting part where I was genuinely impressed.
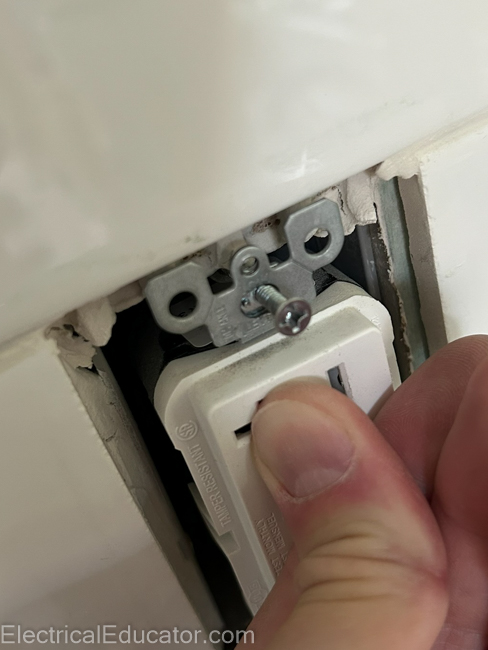
5. Check your fitment. After you do even one of these you’ll get the hang of it. If you need to make any adjustments, go for it. I doubt you will after the first one!
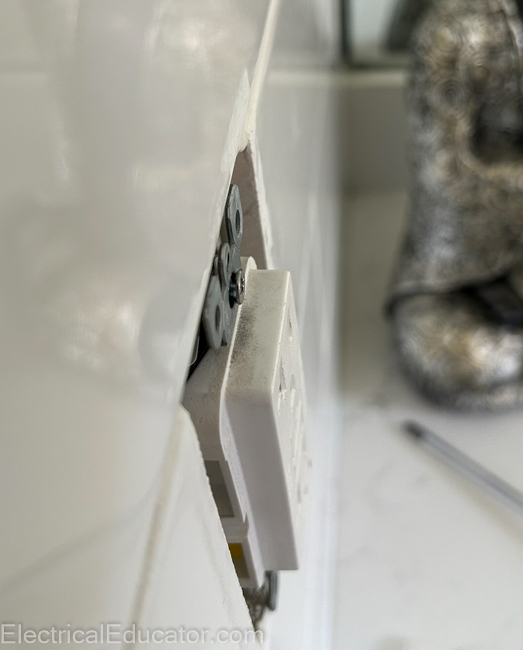
Thats it. It really is that simple. I trust if you’re doing this I don’t need to show you how to put a wall plate on but thats the last step.
Common Problems UniShim Solves
1. Loose outlet Receptacles
You plug something into a receptacle and the entire device moves. This is more common with new tamper resistant receptacles or just anything that fits snugly. Inherently this isn’t a huge deal but over time the constant moving of a receptacle is never good for the conections behind it. A proper spacer can help dramatically support the device to the point of no movement.
2. Sunk-In Receptacles
One of the most common issues electricians encounter is a sunk-in receptacle or switch. This is most common when the wall surface is modified during renovation. Think about a tile wall being added. We have an extra space that needs to be filled and it’s not always necessary to replace the box or sleeve it (much more costly repairs).
UniShim is designed to act as both a remedy and preventative solution by helping establish adjustable spacing behind the device.
3. Oversized Drywall Openings
Sometimes drywall gets cut too aggressively around an electrical box and the receptacle ears don’t touch the wall to keep it steady. We need to be careful here because there are NEC code requirements that require sleeving or replacement of boxes. We’ll touch on that in a minute. In short, however, if the box is 1/4″ or less set in to the wall it’s fair game to use the unishims.
Here’s a typical scenario where tile was added to a wall and the outlet has nothing to hold itself against
4. Service Callbacks
From a contractor perspective, small issues can create expensive callbacks. Nobody wants to return to a new house multiple times because “the outlet still feels loose”. A few minutes of corrective work during the final trim phase can make a huge difference in how the customer perceives the job to have been done. Don’t forget, these issues are mostly NOT caused by electricians but by the other trades such as drywall and tile.
How UniShim Compares To Traditional Outlet Spacers
Here’s a little breakdown of methods I’ve used/done in my experience as a master electrician and how they stack up against each other:
| Method | Advantages | Disadvantages |
|---|---|---|
| Foldable plastic spacers | Inexpensive and common | Can require repeated adjustments |
| Stacked washers | Easy to find | Can be inconsistent and time consuming to install |
| Copper wire tricks | Works in a pinch | Less professional approach |
| UniShim adjustable outlet spacer | Adjustable and reusable | Higher cost than basic spacers |
Most electricians already have their preferred methods and have been using the same tricks for decades. The Unishim are sure to be a game changer because they’re affordable, easy to use, and work better than anything else.
NEC Considerations
UniShim has recently been discussed within the electrical industry, including by Mike Holt, in relation to installation considerations involving NEC 406.5(A).
When evaluating receptacle and switch box installations, the primary code references are NEC 314.20 and NEC 406.5. NEC 314.20 addresses boxes installed in walls or ceilings.
Here’s what you need to know:
For combustible surfaces such as wood paneling, plywood, or similar materials, the front edge of the box cannot be recessed more than 1/4 inch behind the finished surface. If the box is set back more than 1/4 inch, a listed box extender must be installed to bring the box opening closer to the finished surface. For noncombustible surfaces such as tile, drywall, plaster, or concrete, a box may be recessed more than 1/4 inch, provided the gap between the box and the finished surface does not exceed 1/8 inch. If the allowable setback or gap is exceeded, a listed box extender should be used
Regardless of which electrical spacer, outlet shim, or electrical extender solution is used, installations should always follow manufacturer instructions and applicable code requirements.
Many electricians are familiar with using an electrical box extender when boxes sit recessed behind wall surfaces or when installation requirements need correction.
However, there are MANY situations where the electrical box itself may not require extension. This is where the UniShim shines brightly.
Can DIY Homeowners Use UniShim?
Although many applications involve professional electricians, UniShim products can also be used by homeowners performing DIY projects. As with anything, TURN THE POWER OFF if you’re working on. I don’t care if you’re a professional doing this for 40 years or a DIY’er just making a few repairs. Get yourself a simple tick tester and a basic electric meter and confirm you have the power off at the breaker!
Typical situations might include correcting loose outlets, fixing a loose or crooked switch, supporting a light fixture, and adjusting devices that are sitting in the wall
As with any electrical work, homeowners should understand proper safety procedures and know when a licensed electrician should be involved.
Where To Buy
UniShim products can be purchased online via amazon here.
There are 3 different options available:
6-32 Configuration Unishim: These are what is used for most devices from receptacles (outlets), switches, dimmers, light fixtures. etc. More than likely this is what you need if you’re working on any of the devices I listed above. They’re offered in a 10 pack and a 50 pack.
8-32 Configuration Unishim: These are larger and used for mounting and securing metallic boxes.
DONT FORGET you may need longer screws as well!
For 6-32 Screws, this is a great pack
For 8-32 Screws, this will do just fine
If you’re a supply house, head over to unishim.com or feel free to reach out to me and I can connect you with a wholesaler. Here’s what the packaging looks like:
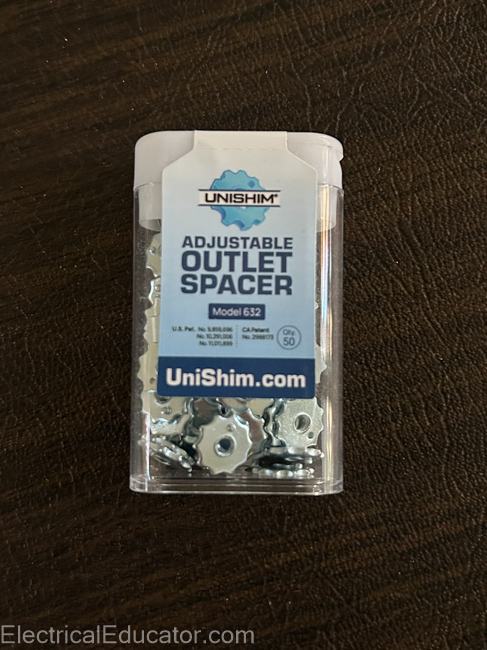
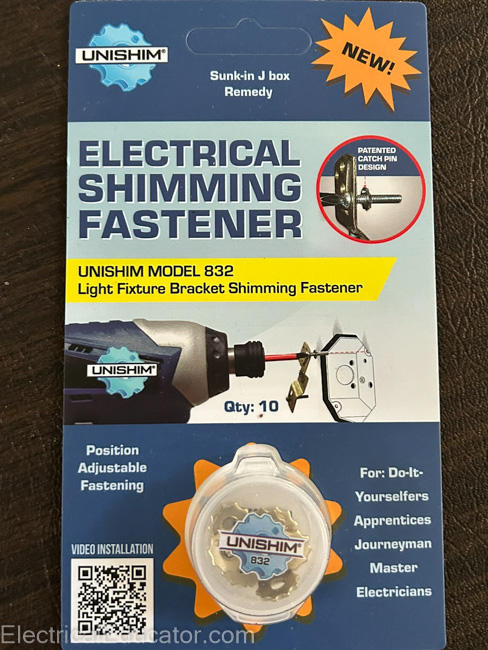
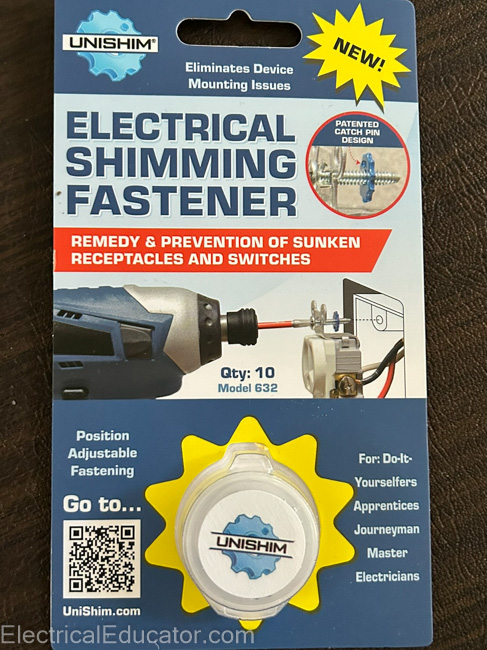
I’d like to thank Robert Jack, the inventor of the Unishim, and Charlie Ash for sending me some unishims to try. I will 100% be adding these to our service trucks and I’ve already requested our supply house to start stocking them. Please don’t hesitate to reach out to me for more information or to connect you to Robert or Charlie directly. Thank you for reading.
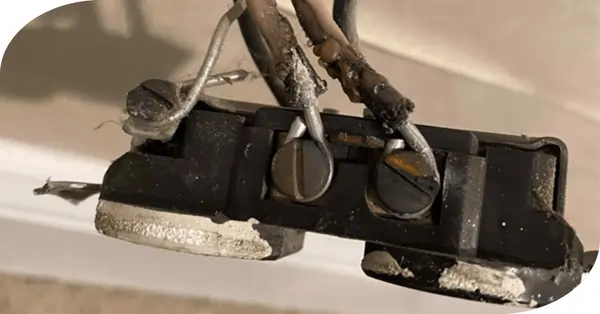
This is a great write up on the Unishim. Thanks for posting !!!
Thanks much Charlie!