Thinking of upgrading to a Ring video doorbell? Read this first.
Whether you’re looking for peace of mind, package security, or a way to keep an eye on front porch squirrels, Ring doorbells can be a smart addition. But not all Ring models work the way you think—especially when it comes to wiring. I’ll break down which units you should consider and what to expect during a Ring doorbell installation, whether you’re replacing an existing doorbell or planning a new ring doorbell installation. I made a nice little ring doorbell wiring diagram so you can fully understand exactly what is happening (and for you learning electricians out there!).
Why Hardwiring Matters
Sure, a Ring video doorbell can run on battery power, but hardwiring is far more reliable—for too many reasons to list. As a master electrician, I constantly deal with customers who bought the wrong model and ended up frustrated. Let’s avoid that.
Not All Ring Doorbells Are Truly Wired
Some Ring models advertise “wired” functionality, but that just means the wiring trickle-charges the battery. You still have to remove and recharge the battery manually, especially in cold weather or high-traffic areas. Avoid these models if you want a set-it-and-forget-it setup:
- Ring Video Doorbell (2nd Gen)
- Battery Doorbell Plus
- Ring Video Doorbell 3 / 4 / 3 Plus
Even when wired, these require battery swaps every few months. If that sounds annoying—it is.
Fully Hardwired Ring Models (Best for Long-Term Use)
These models run 100% off power from your existing doorbell transformer and don’t rely on a battery:
- Ring Video Doorbell Pro / Pro 2: No internal battery. Requires 16–24 VAC. These typically work with existing chimes.
- Ring Wired / Ring Wired Plus: Budget-friendly options. Note: the basic model does not work with mechanical chimes.
- Ring Elite: Uses Power over Ethernet (PoE). Great if you’re already set up for Ethernet.
What About Chimes?
If you’re attached to the idea of using an existing chime, read product specs carefully. I don’t recommend it. Traditional chimes often cause hums, buzzing, or random ringing. Ring offers a wireless plug-in chime, and I love these for their flexibility. Want it silent? Simply disable it in the app, or unplug it.
Bottom Line:
If you already have doorbell wiring and want reliability, go with the Ring Pro 2 or Ring Wired. This article focuses on hardwired Ring doorbell installation, so unless you have zero wiring options, skip the battery-only models.
Ring Video Doorbell Installation: How It’s Done
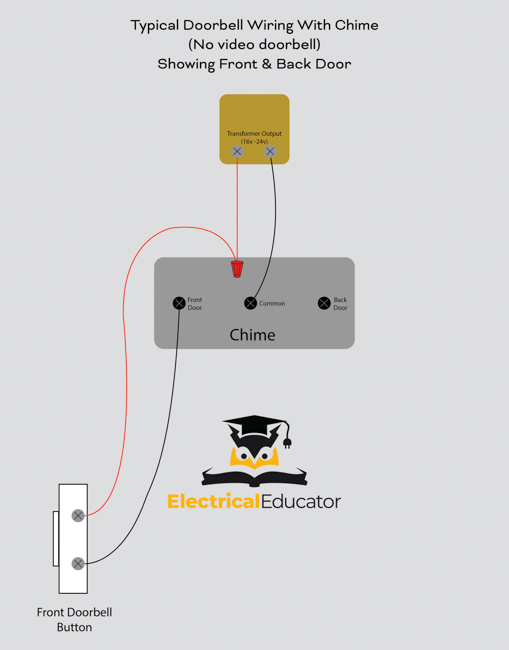
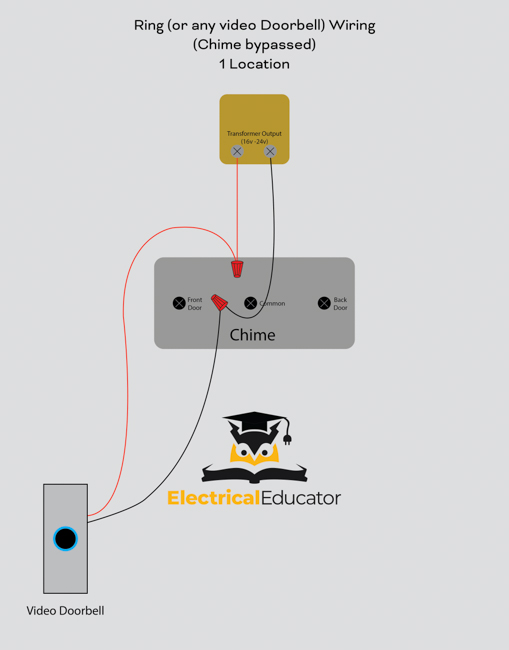
There are two installation paths: a brand-new install or replacing an existing system. Take a look at the following diagrams. The first is how a regular doorbell and chime is wired (1 location). The second is the ring doorbell wiring diagram. We need to get power from the transformer to the video doorbell. In a new install (read below) you’ll see there is no chime associated at all and the wires simply go from the transformer directly to the video doorbell.
Option 1: New Ring Video Doorbell Installation
If your home doesn’t have working doorbell wiring or the transformer can’t be located, you’re in for a full new setup.
- Locate consistent 120V power (not on a switch) in an accessible area like a basement, attic, or panel.
- Install a 16–24V transformer at that location. Must be accessible—never bury it in a wall (NEC rule).
- Run low-voltage 2-wire cable to the new doorbell location.
- Complete the Ring doorbell installation by mounting the unit and following app pairing instructions.
- (Optional) Install a wireless chime that plugs into any outlet. Skip the wired chime unless you love extra labor and wall clutter.
Pro tip: Get a licensed electrician’s estimate before buying a Ring. Many folks underestimate the effort involved. Use our National Electrical Registry to find someone local to help you out.
Option 2: Add a Ring Video Doorbell to an Existing System
If your house already has a traditional doorbell:
- Find and inspect the existing transformer. Most older ones are 11V. Replace with a 16–24V version if needed.
- Locate the chime box. I recommend bypassing it altogether. Chimes can cause future issues.
- Splice wires to send power directly to the doorbell. Use a multimeter to verify voltage and connections. Remember: power should flow Transformer → Chime → Doorbell. Refer to the above ring doorbell wiring diagram!
- Complete the Ring doorbell installation once proper voltage is confirmed.
Most installations don’t require wall cutting and are relatively non-invasive.
Here are some pictures of a recent ring video doorbell installation:
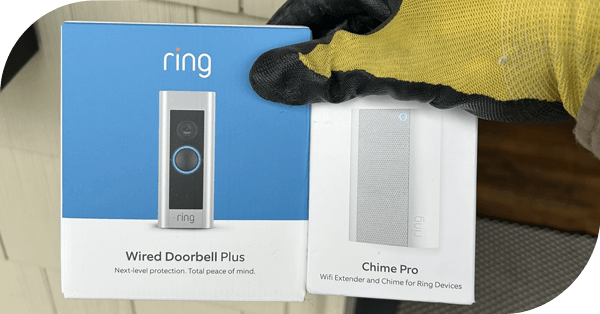
Select which ring video you want for installation and buy them, read above for what you should be looking for:
")
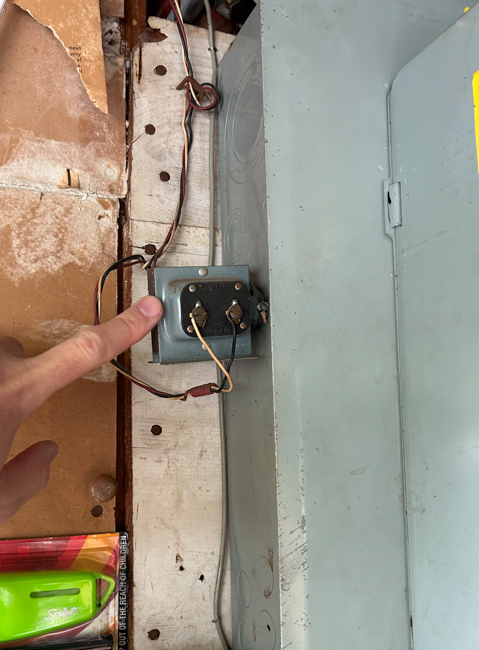
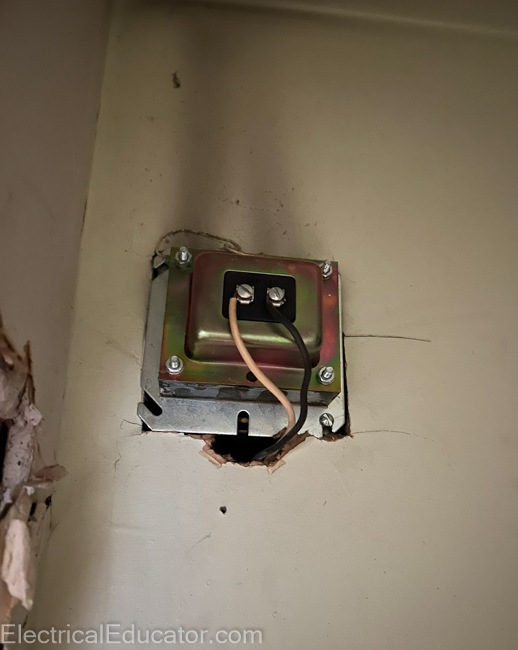
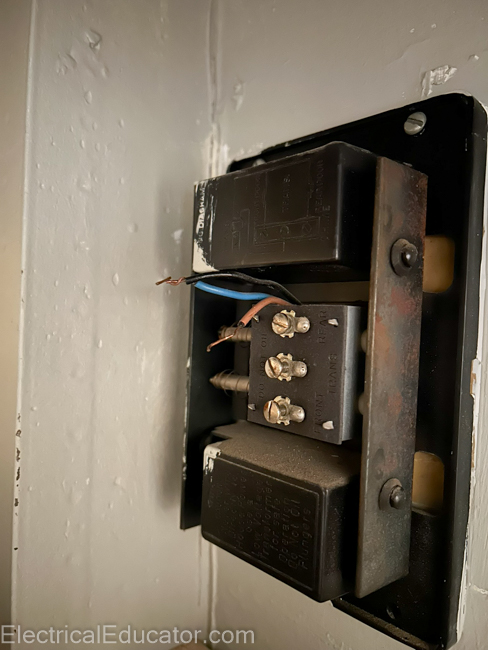
Here are examples of existing transformers. One is located on an electrical panel and one is in a junction box in a closet:
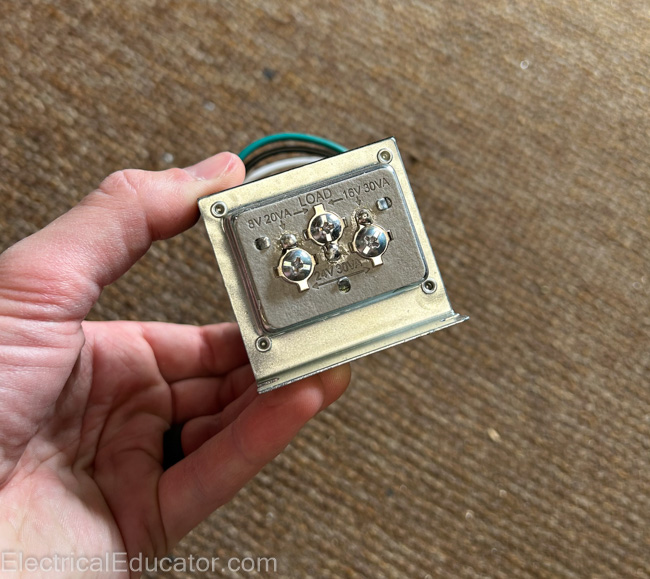
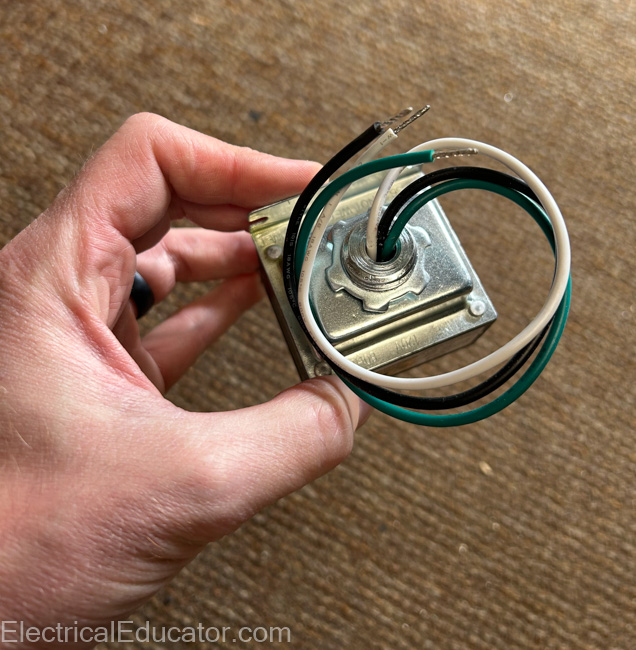
Here is what a new multi voltage door bell transformer looks like:
Rewire the chime to get consistent power at the doorbell location (refer to my ring video wiring diagram!):
This is what consistent power looks like, anything between 16-24V will work for most video doorbell systems (this was fun with 1 hand!):
")
Use the supplied wires to connect the ring doorbell:
")
Fasten the doorbell to the house and open the app and get it set up:
-1-2")
Configure your plug in chime and your ring video doorbell installation is done!:

Pro Tips
- Install the Ring app and create an account before the installation.
- Locate the QR code on the doorbell and chime literature to pair easily.
- Hire a licensed electrician. We do this all the time and won’t burn your house down.
- Think Ecosystem before you buy:
There are plenty of video doorbell brands out there. Consider what you already own or might want in the future. If you have other Ring devices like motion lights or a Ring security system, it makes sense to stay within that ecosystem. For example, I have Eufy cameras at home, so I chose a Eufy video doorbell to stay consistent. Ring also makes great hardwired camera lights, so factor in long-term integration.
Final Thoughts
If you’re planning a hardwired Ring doorbell installation, choose a model designed for it. Avoid battery-only units unless wiring isn’t possible. Consider your entire smart home setup, and always plan the install before making the purchase. Always hire a licensed electrical contractor for your ring video installation and you’ll be on your way with nice notifications and funny videos to look at for years to come. Need a licensed electrician in your area? Check out our National Electrical Registry here.
Whether you’re installing it for safety, convenience, or to yell at raccoons in the driveway, doing it right the first time makes all the difference. Feel free to ask any questions in the comments or shoot me a message, I’m always here! Thank you for reading.